By Antonio Malara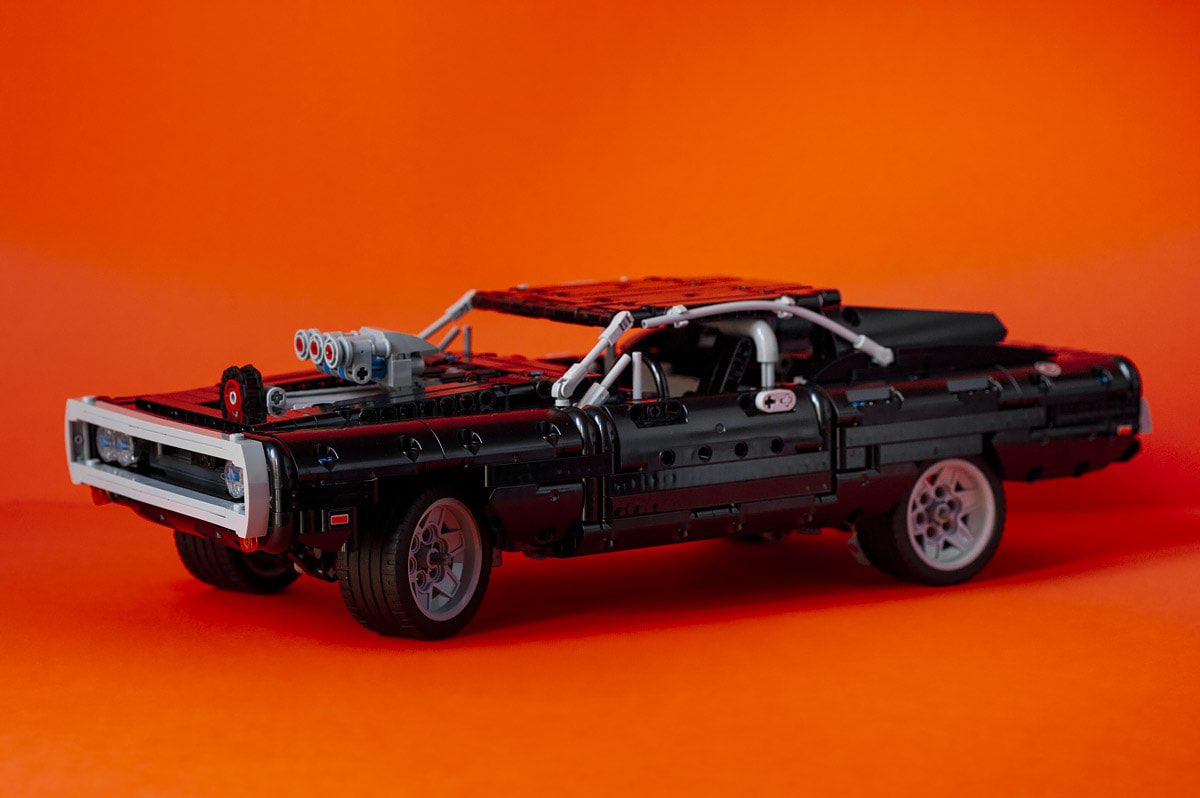 Although the Fast and Furious franchise already has nine films, it's the first of the series that fascinates me the most. Even if in the following chapters there are more spy story plots and very engaging action scenes, I see the first story as more real. In fact, the film is more genuine, with the characters and their stories that are in their infancy and is a perfect mix of action and feelings. Most of the time I love characters in the "present" because they have a past and therefore stories. Their projection into the future has not yet taken place and I like to fantasize events according to my mood. This is one of the reasons why I prefer the adventure of the first chapter, when in essence the various characters are introduced in the unfolding of the actions. In addition to the protagonists, there is one that is introduced as an heirloom, namely Dominic Toretto's Dodge Charger. It’s introduced as a static element, a 900 horsepower car modified by Dominic and his father and that the protagonist does not have the courage to drive. The Charger is not a simple car, but an object with a soul, in fact it represents the family, the past and a connection with Dominic's father who is no longer alive. In addition to the beautiful aesthetics of the car, it was this story that made me choose this lego model to assemble, a modeling object is even more beautiful when it has a meaning that goes beyond aesthetics and this car has so many. This was the mood I had when I started building the Dodge, a classic car that has a new life in a more modern story and a symbolic meaning that identifies an entire franchise. Unfortunately this was marked by fatality by the tragic death of Paul Walker who was the protagonist along with Vin Diesel who plays Toretto. Reality and fiction have mixed in an absurd destiny and this also makes me love the first story, the original one where the future had not yet been written. 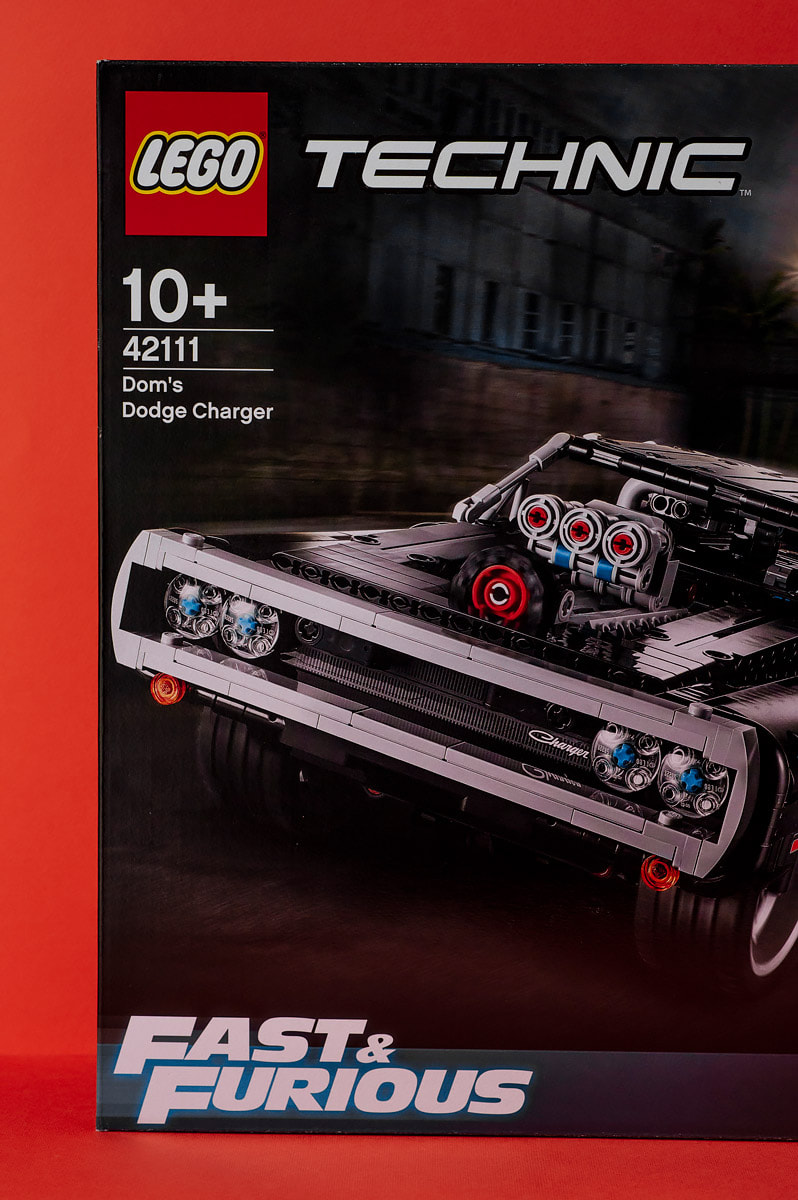 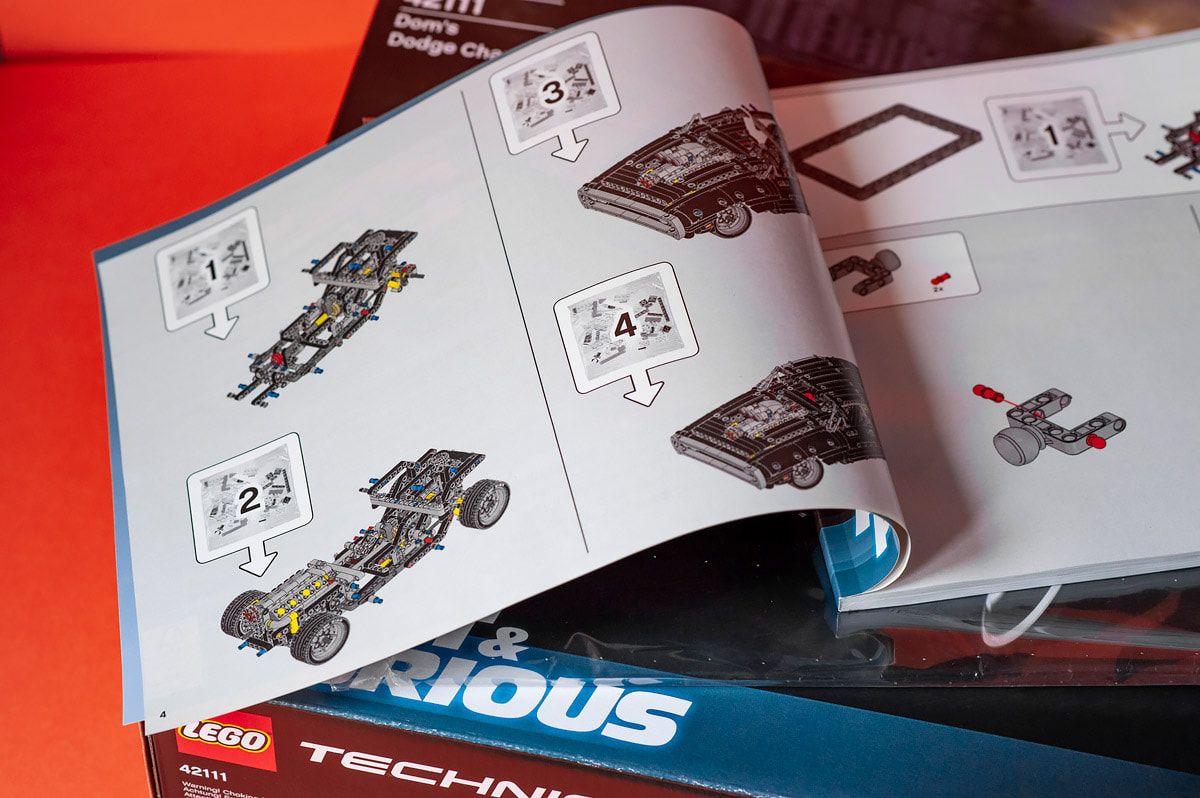 Assembly Process In the instructions inside the box, the car assembly process is divided into four parts. Normally I take there as a reference and build the lego following the model of the instructions, which I also did with this one. Personally I consider the four phases as four different days and this helps me to understand how long it takes to assemble a lego. However, in this case I had a small surprise linked to the timing of the individual phases. As with other legos, even in this one, for each phase there were two envelopes, one large and one small and inside the big one other two small envelopes. Inside the box, in addition to the numbered envelopes, there were tires and a rectangle already assembled. The first phase was from step 1 to step 81 and I immediately used the rectangular brick present outside the envelopes. Although it was the third car I assembled, I used different bricks for the first time, plus I assembled many small parts that I assembled together later. For the first time I have also mounted some springs-shock absorbers and motor gears, details never present in the other lego cars mounted until now. A problem I encountered in the first phase was the difficulty of joining some of these separately mounted components to the body. It was a very complex and technical phase and it took me an hour and thirty minutes to complete it. Compared to the average time of other legos, this car took almost double the time. However, I made no mistakes. The second phase was from number 82 to 149. Up to step 112 I mounted the front axle which I then joined to the rest of the body. The peculiarity that I noticed in this phase was the fact that the assembly did not always take place in a symmetrical way even though the final result was. From step 122 to 131 I mounted the engine and this process was very exciting. The cylinders, the timing chain, all built with incredible details. Initially I thought they were just for aesthetics but when I finally mounted the wheels, I discovered that the motion of the car really activated the theoretical combustion process. Seeing the cylinders and the chain moving was a unique pleasure. This phase was also very technical and it took me over an hour to complete it. I also had the feeling that the small components were more resistant than those of other legos. On the third day I mounted the passages between 150 and 267. Initially I mounted the front with the only difficulty in applying the sticker that reproduced the radiator where there was the word "Charger". Then it was the turn of the mudguards, passages that were all the same but very fun to perform. Lastly, on the third day, I mounted the doors. Almost an hour and a half without encountering difficulties besides the episode of the sticker. The fourth and last phase was from the passage 268 to 358, was characterized by the assembly of the rear and the roof. Up until that moment the back of the car seemed very bare and in reality the process to get to the end was not a short one. However, this phase was quite simple, I completed the assembly of the car in an hour and thirty minutes but without particularly technical processes. 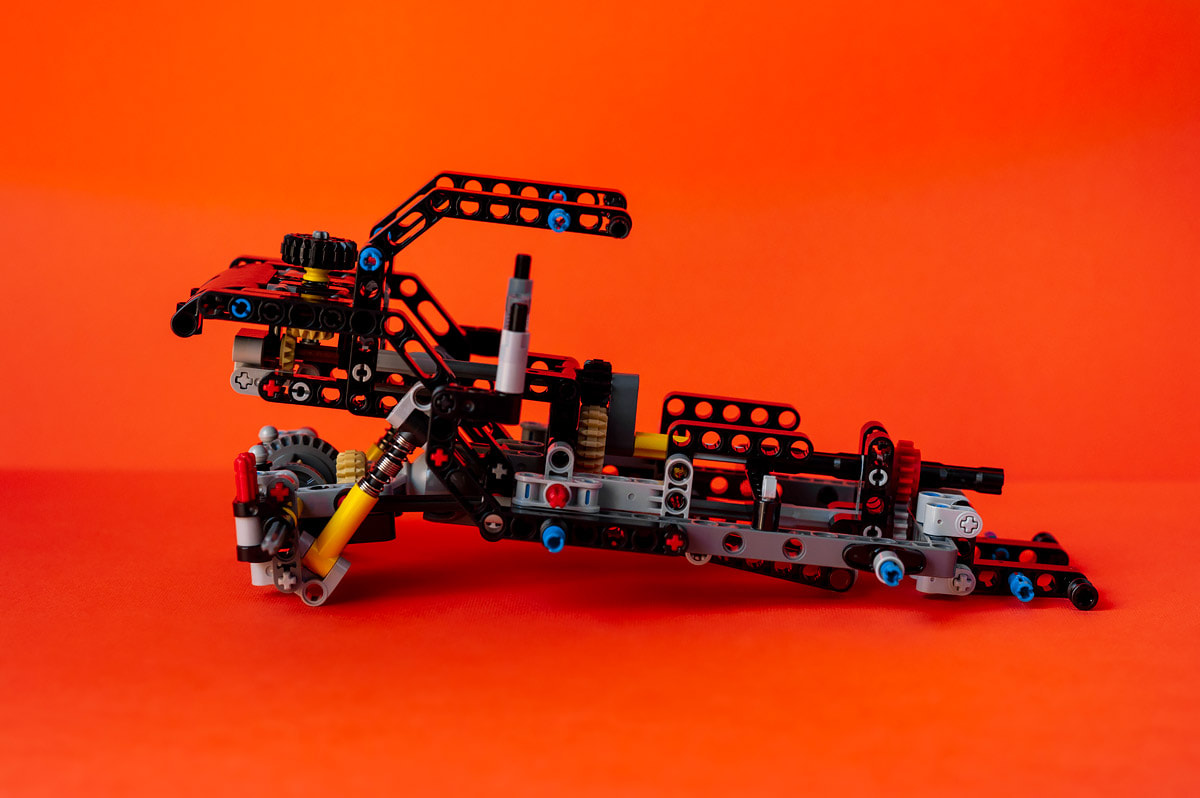 Day 1 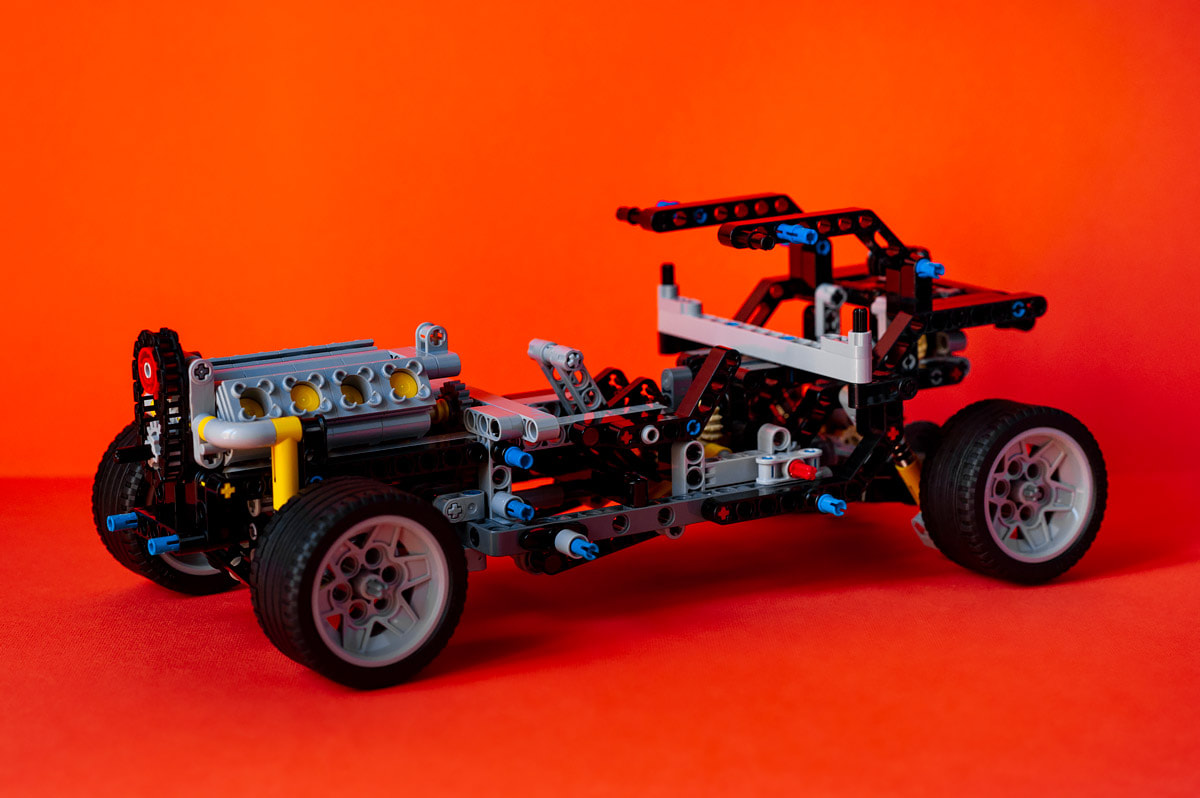 Day 2 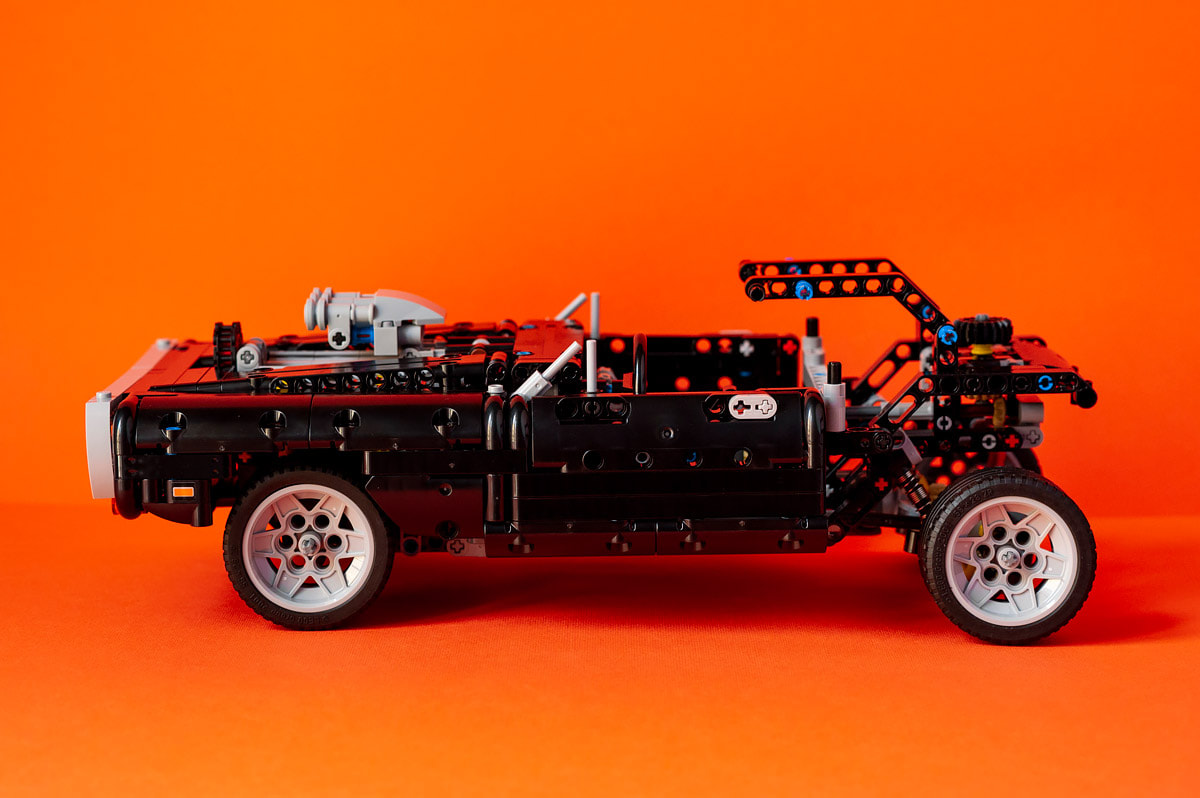 Day 3 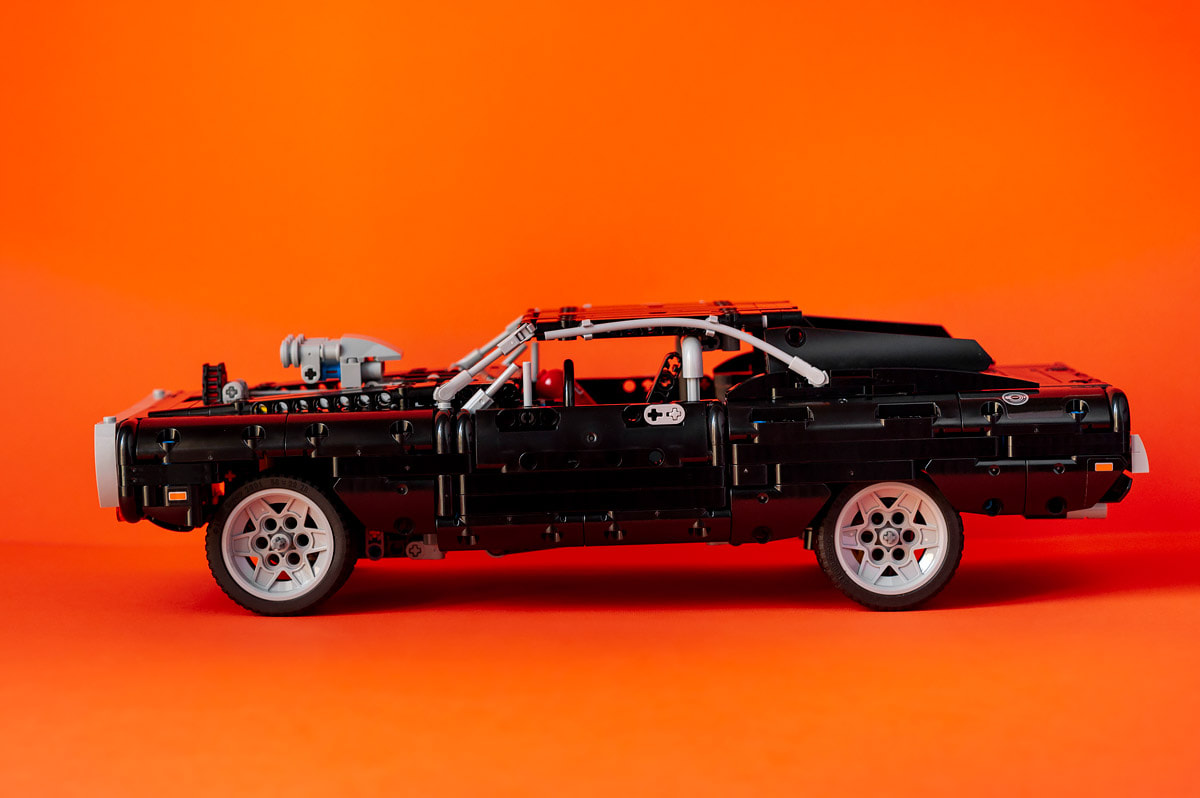 Day 4 Once completed, the Dom's Dodge Charger is a powerful looking car and a bit wild in the Lego version. There are no windows and along the body there are many small holes created ad hoc to make it more brutal and with a lived-in look. A peculiarity is the size of the car; while having roughly the same number of parts as the Aston Martin DB5, the Charger is much bigger. In addition to this, I believe that the proportions of the Dodge are more real than the Aston Martin and this I had also described when I mounted the James Bond’s car. I must say that assembling cars excites me a lot more than assembling other types of lego. Probably due to the small components present in cars that are more complex than, for example, an architecture lego. While I was assembling the Dom's Charger, lego presented a new car, also featured in a very popular movie. As I write to correct this post, I have already purchased the product in question. So my next lego will still be a car, a type of lego that certainly excites me and stimulates me a lot. 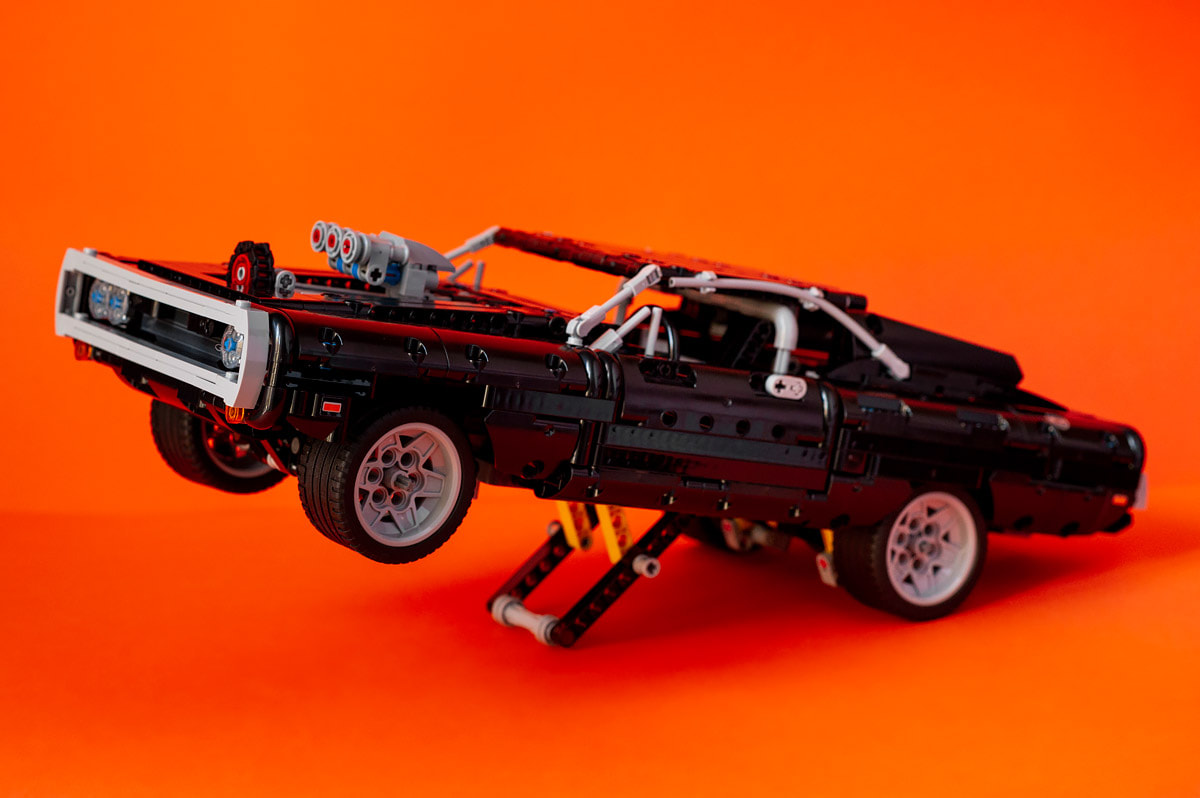 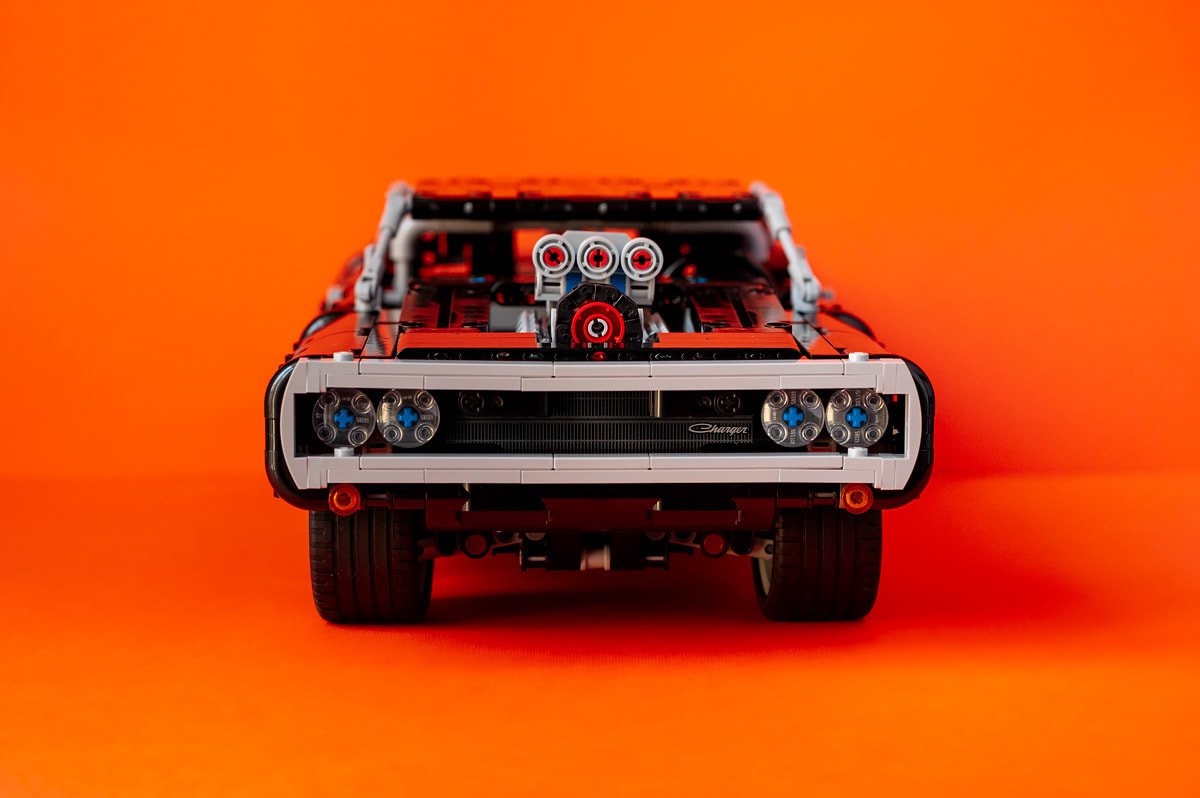 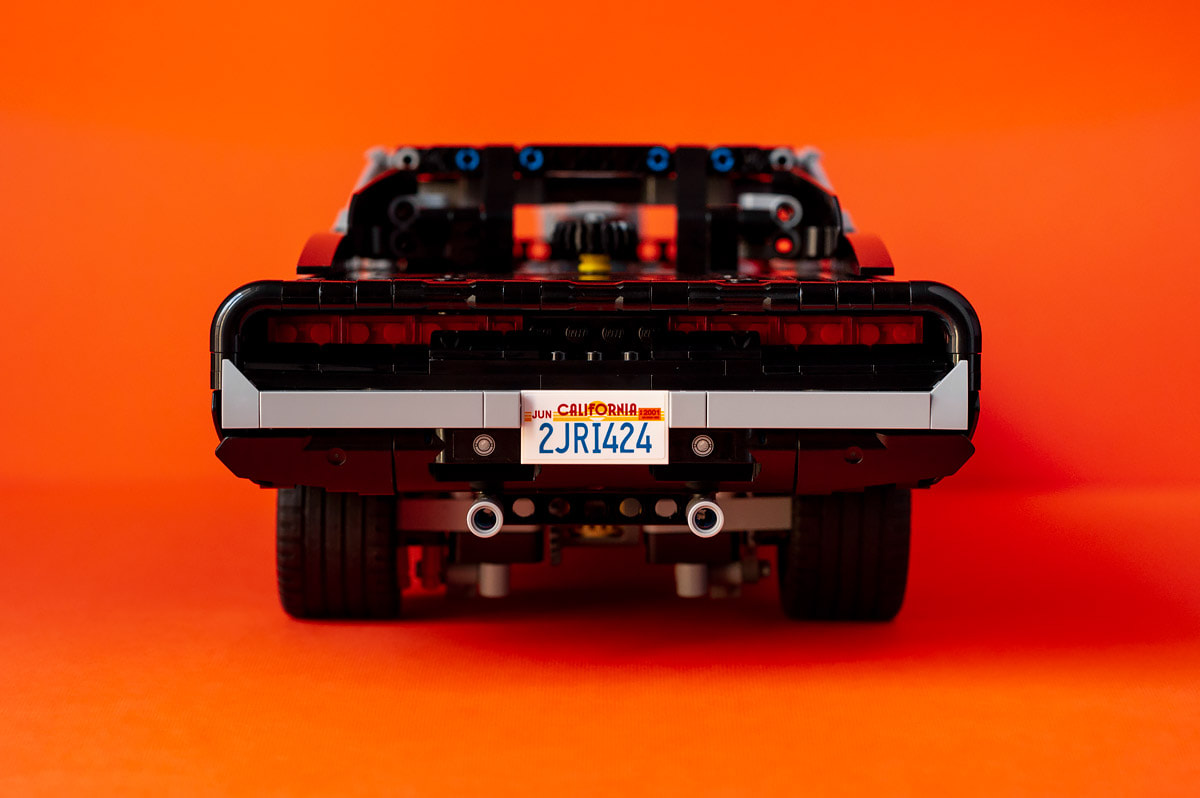 Details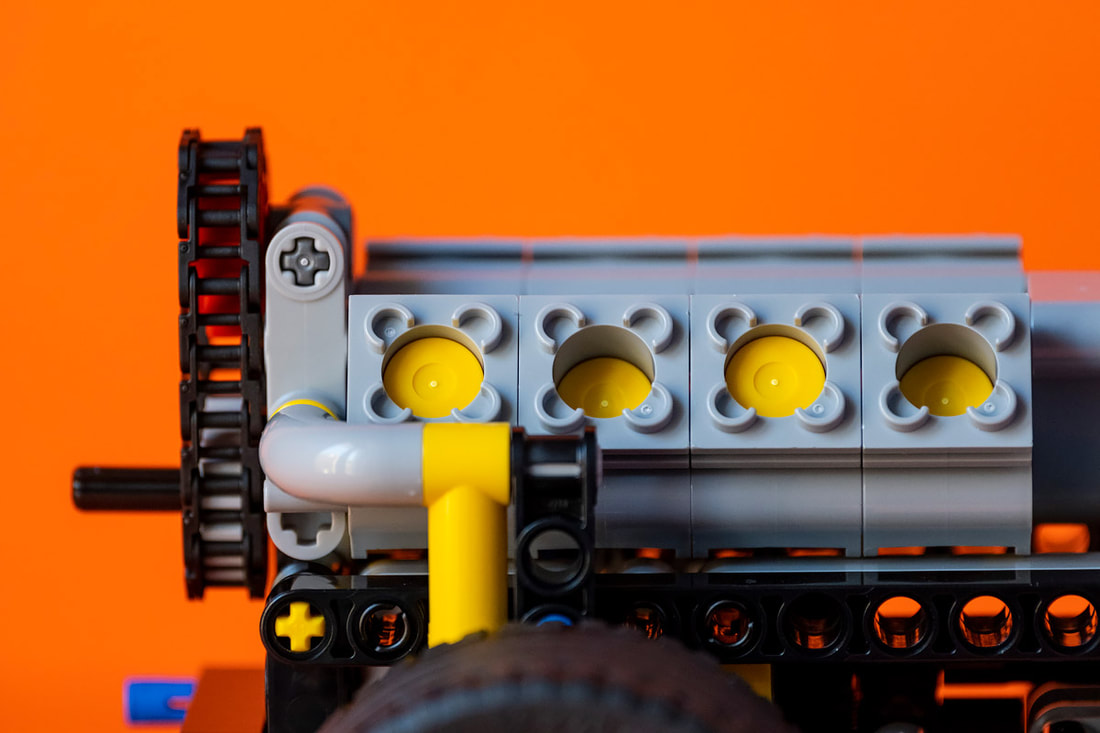 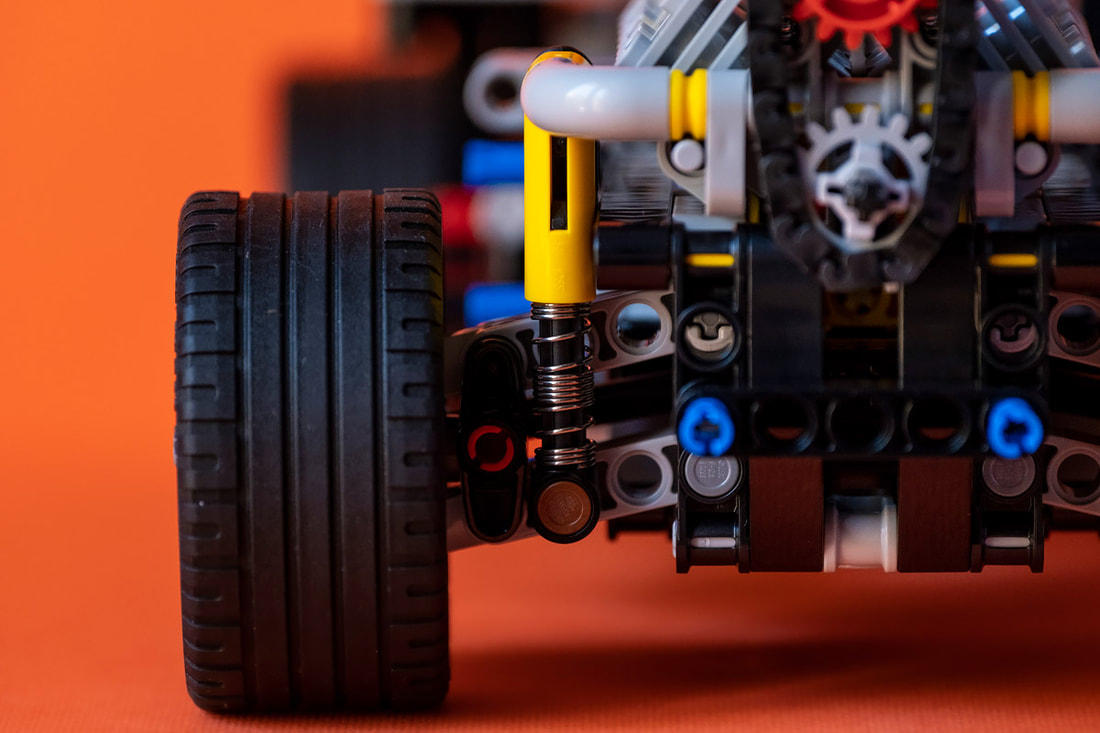 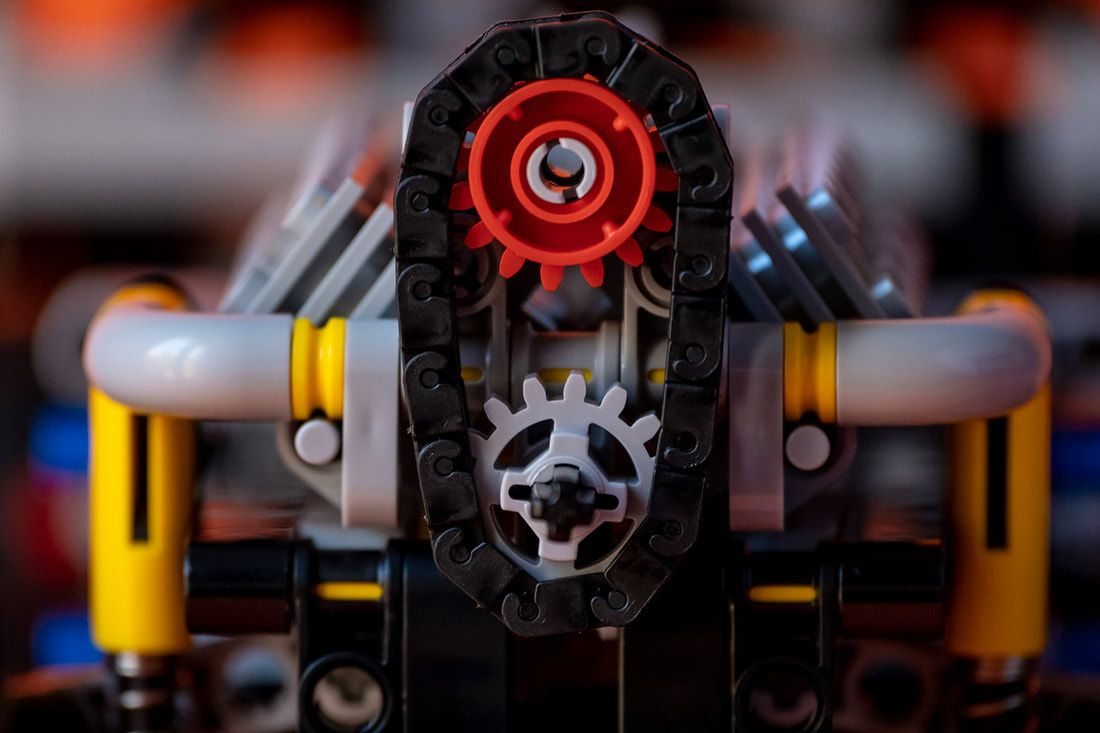 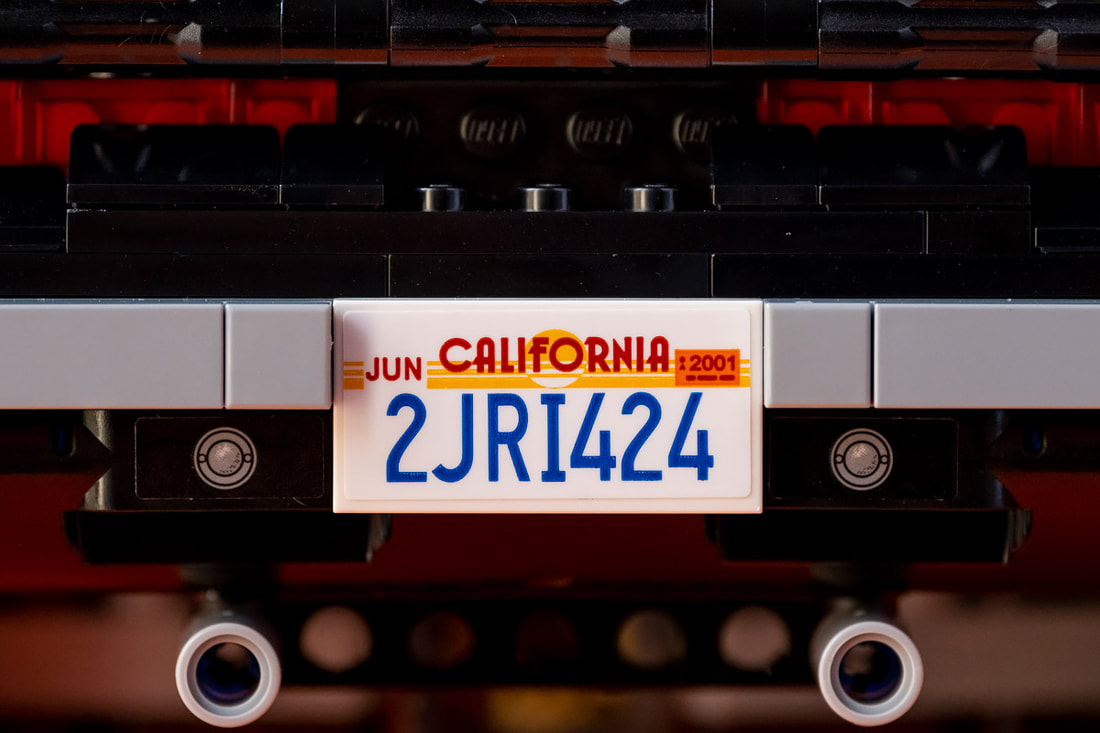 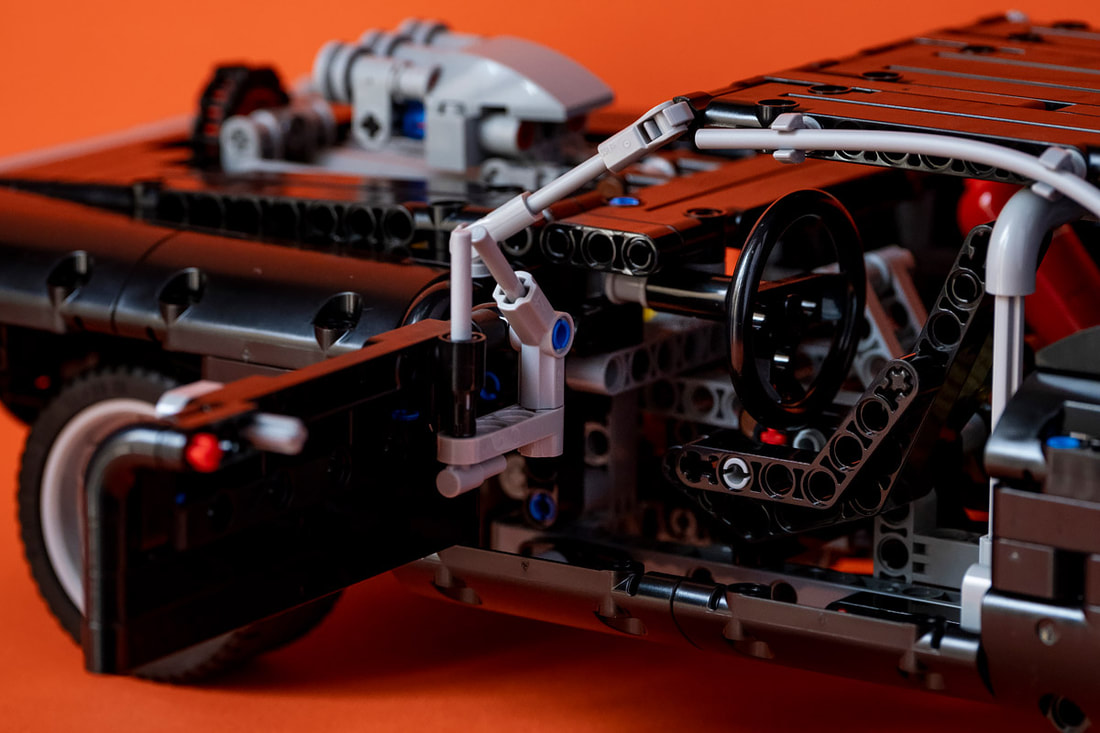 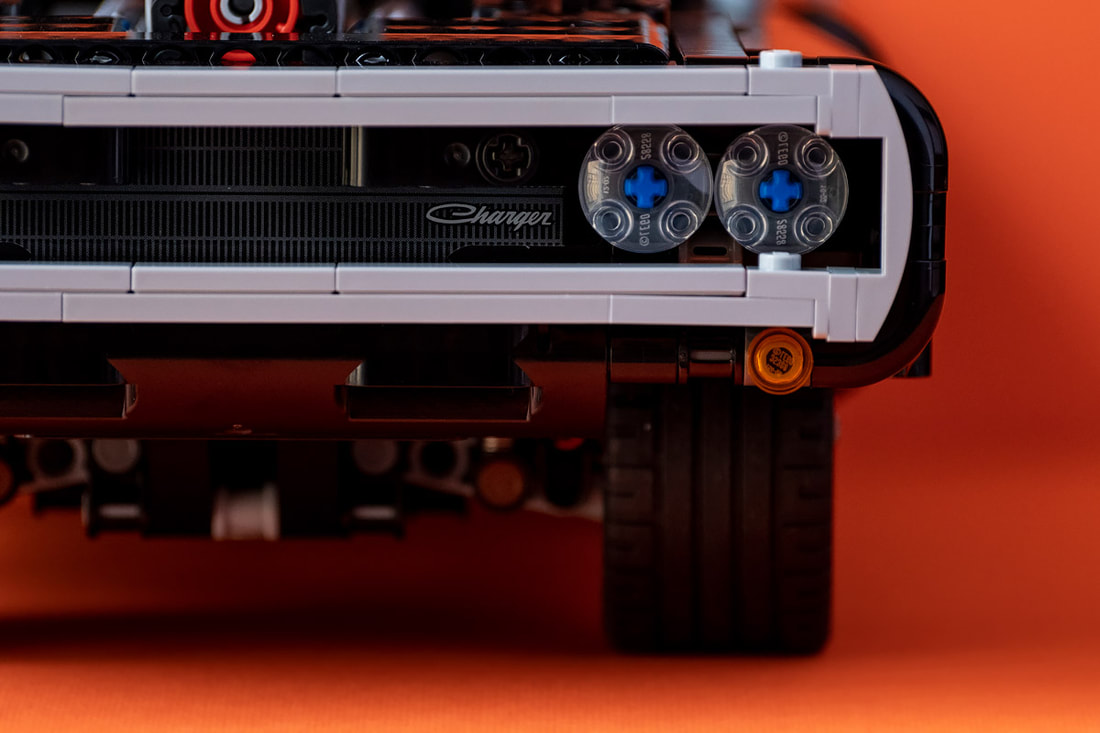 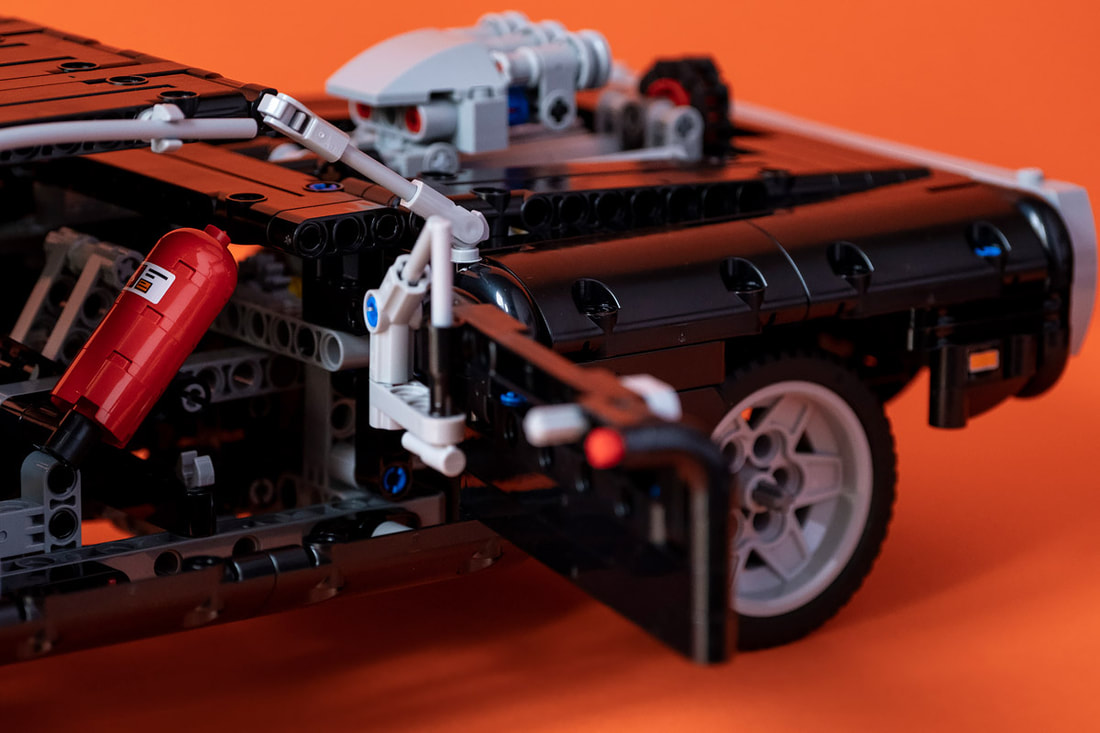 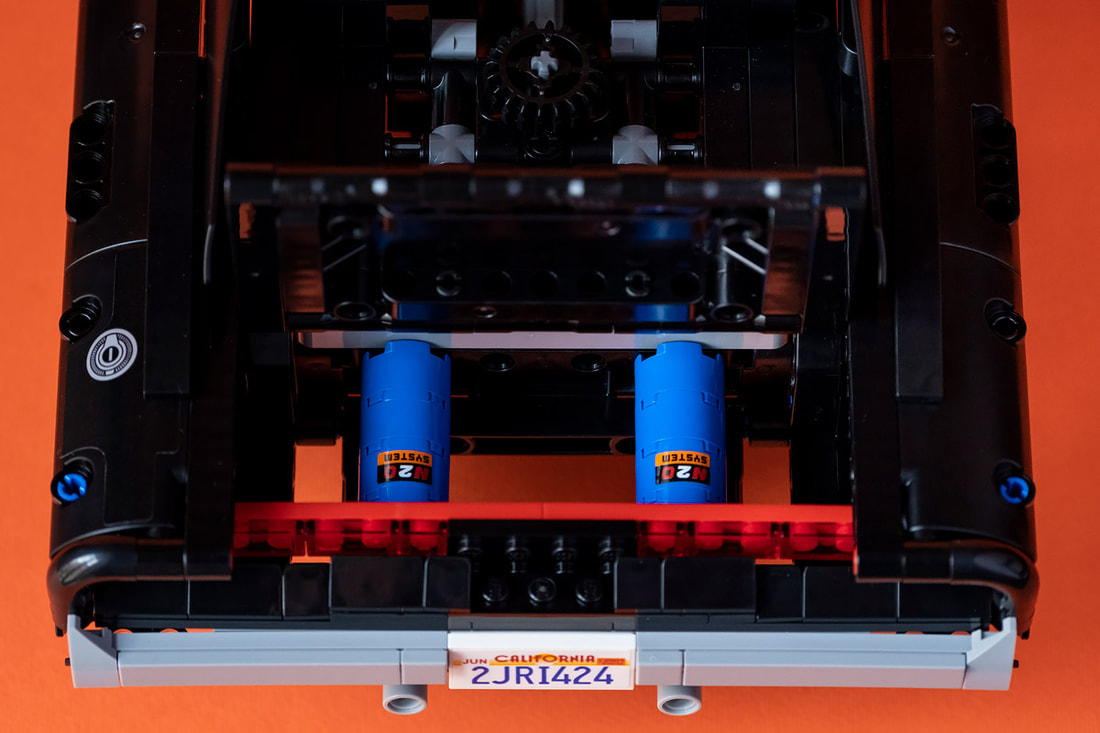 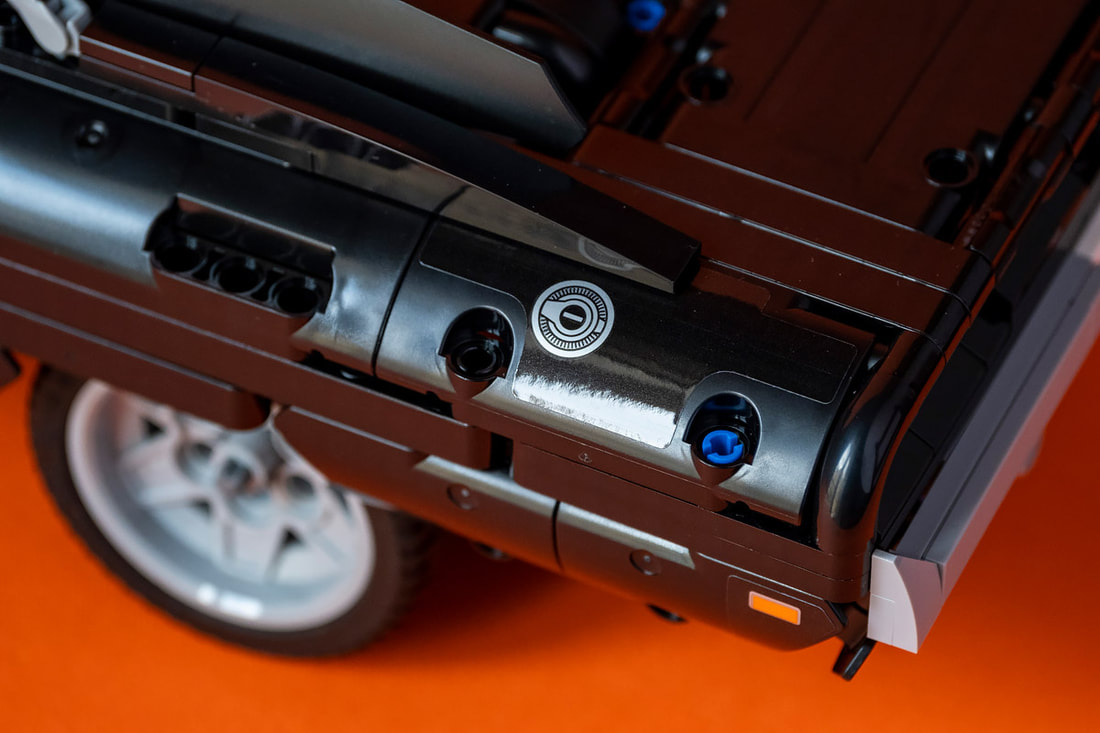 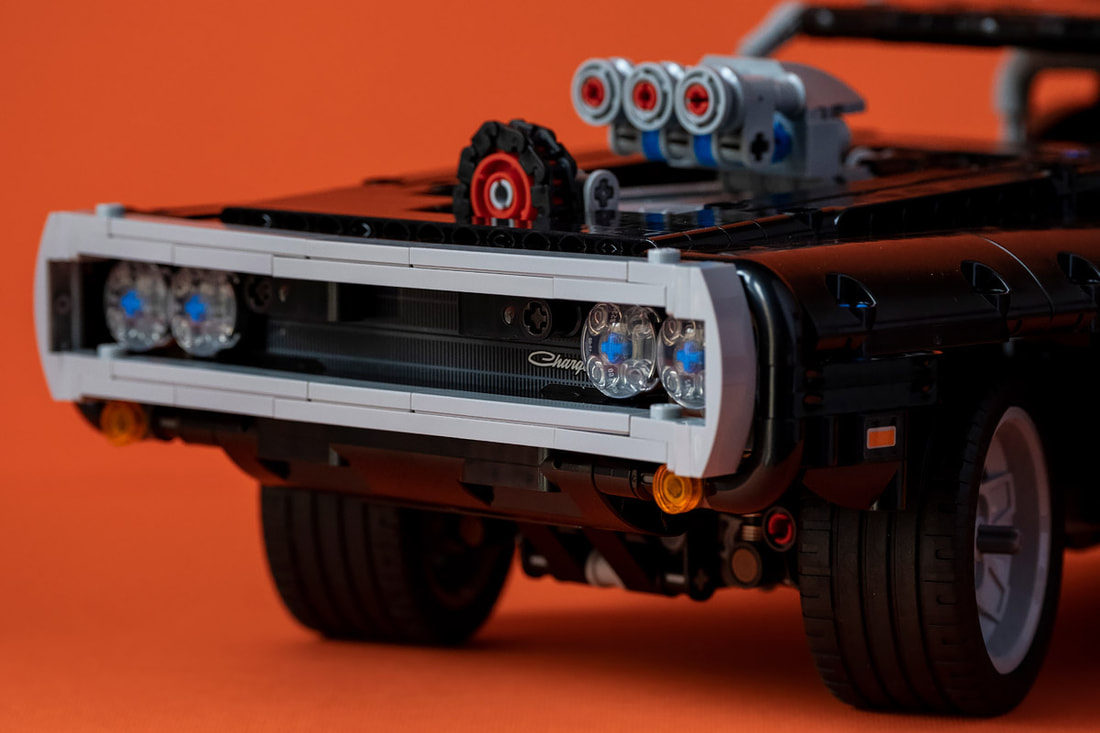 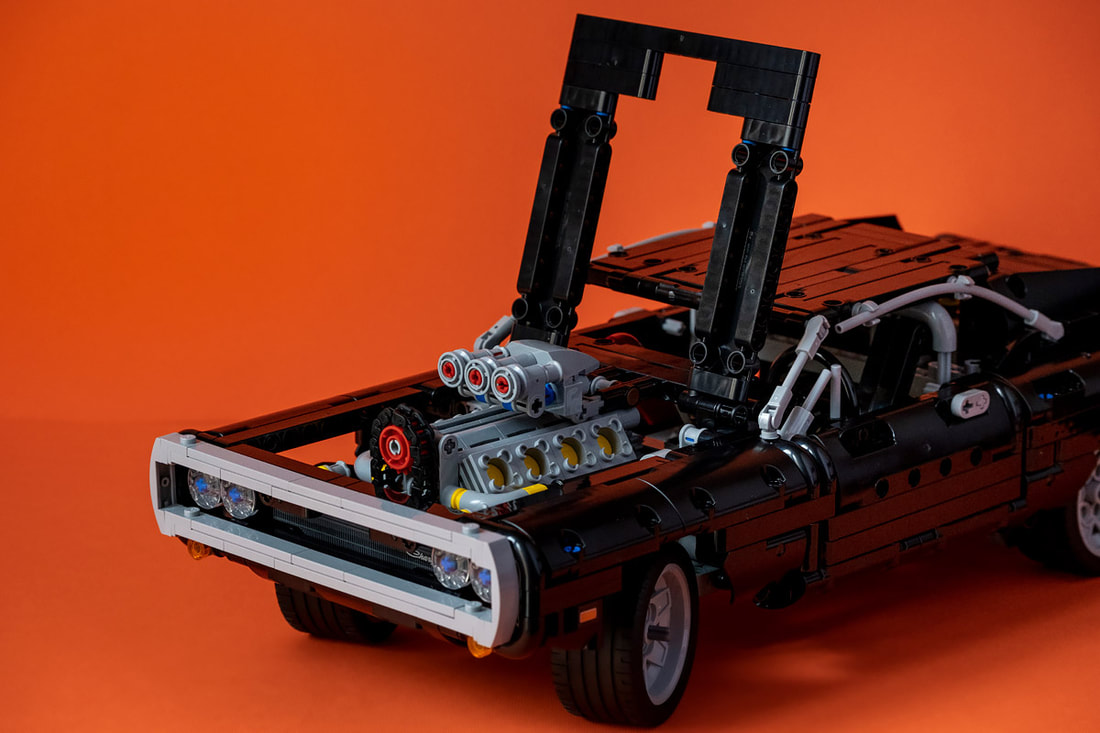  Pictures: Antonio Malara
0 Comments
Leave a Reply. |